
Before you start
- You need Inventory Management.
- Brands are also created when you type a new brand name on an item.
Steps
Add a brand
-
In the sidebar, select Catalog & Inventory › Items.
-
Select Manage brands. "Brands" opens: "Company-wide brand list used by inventory items."
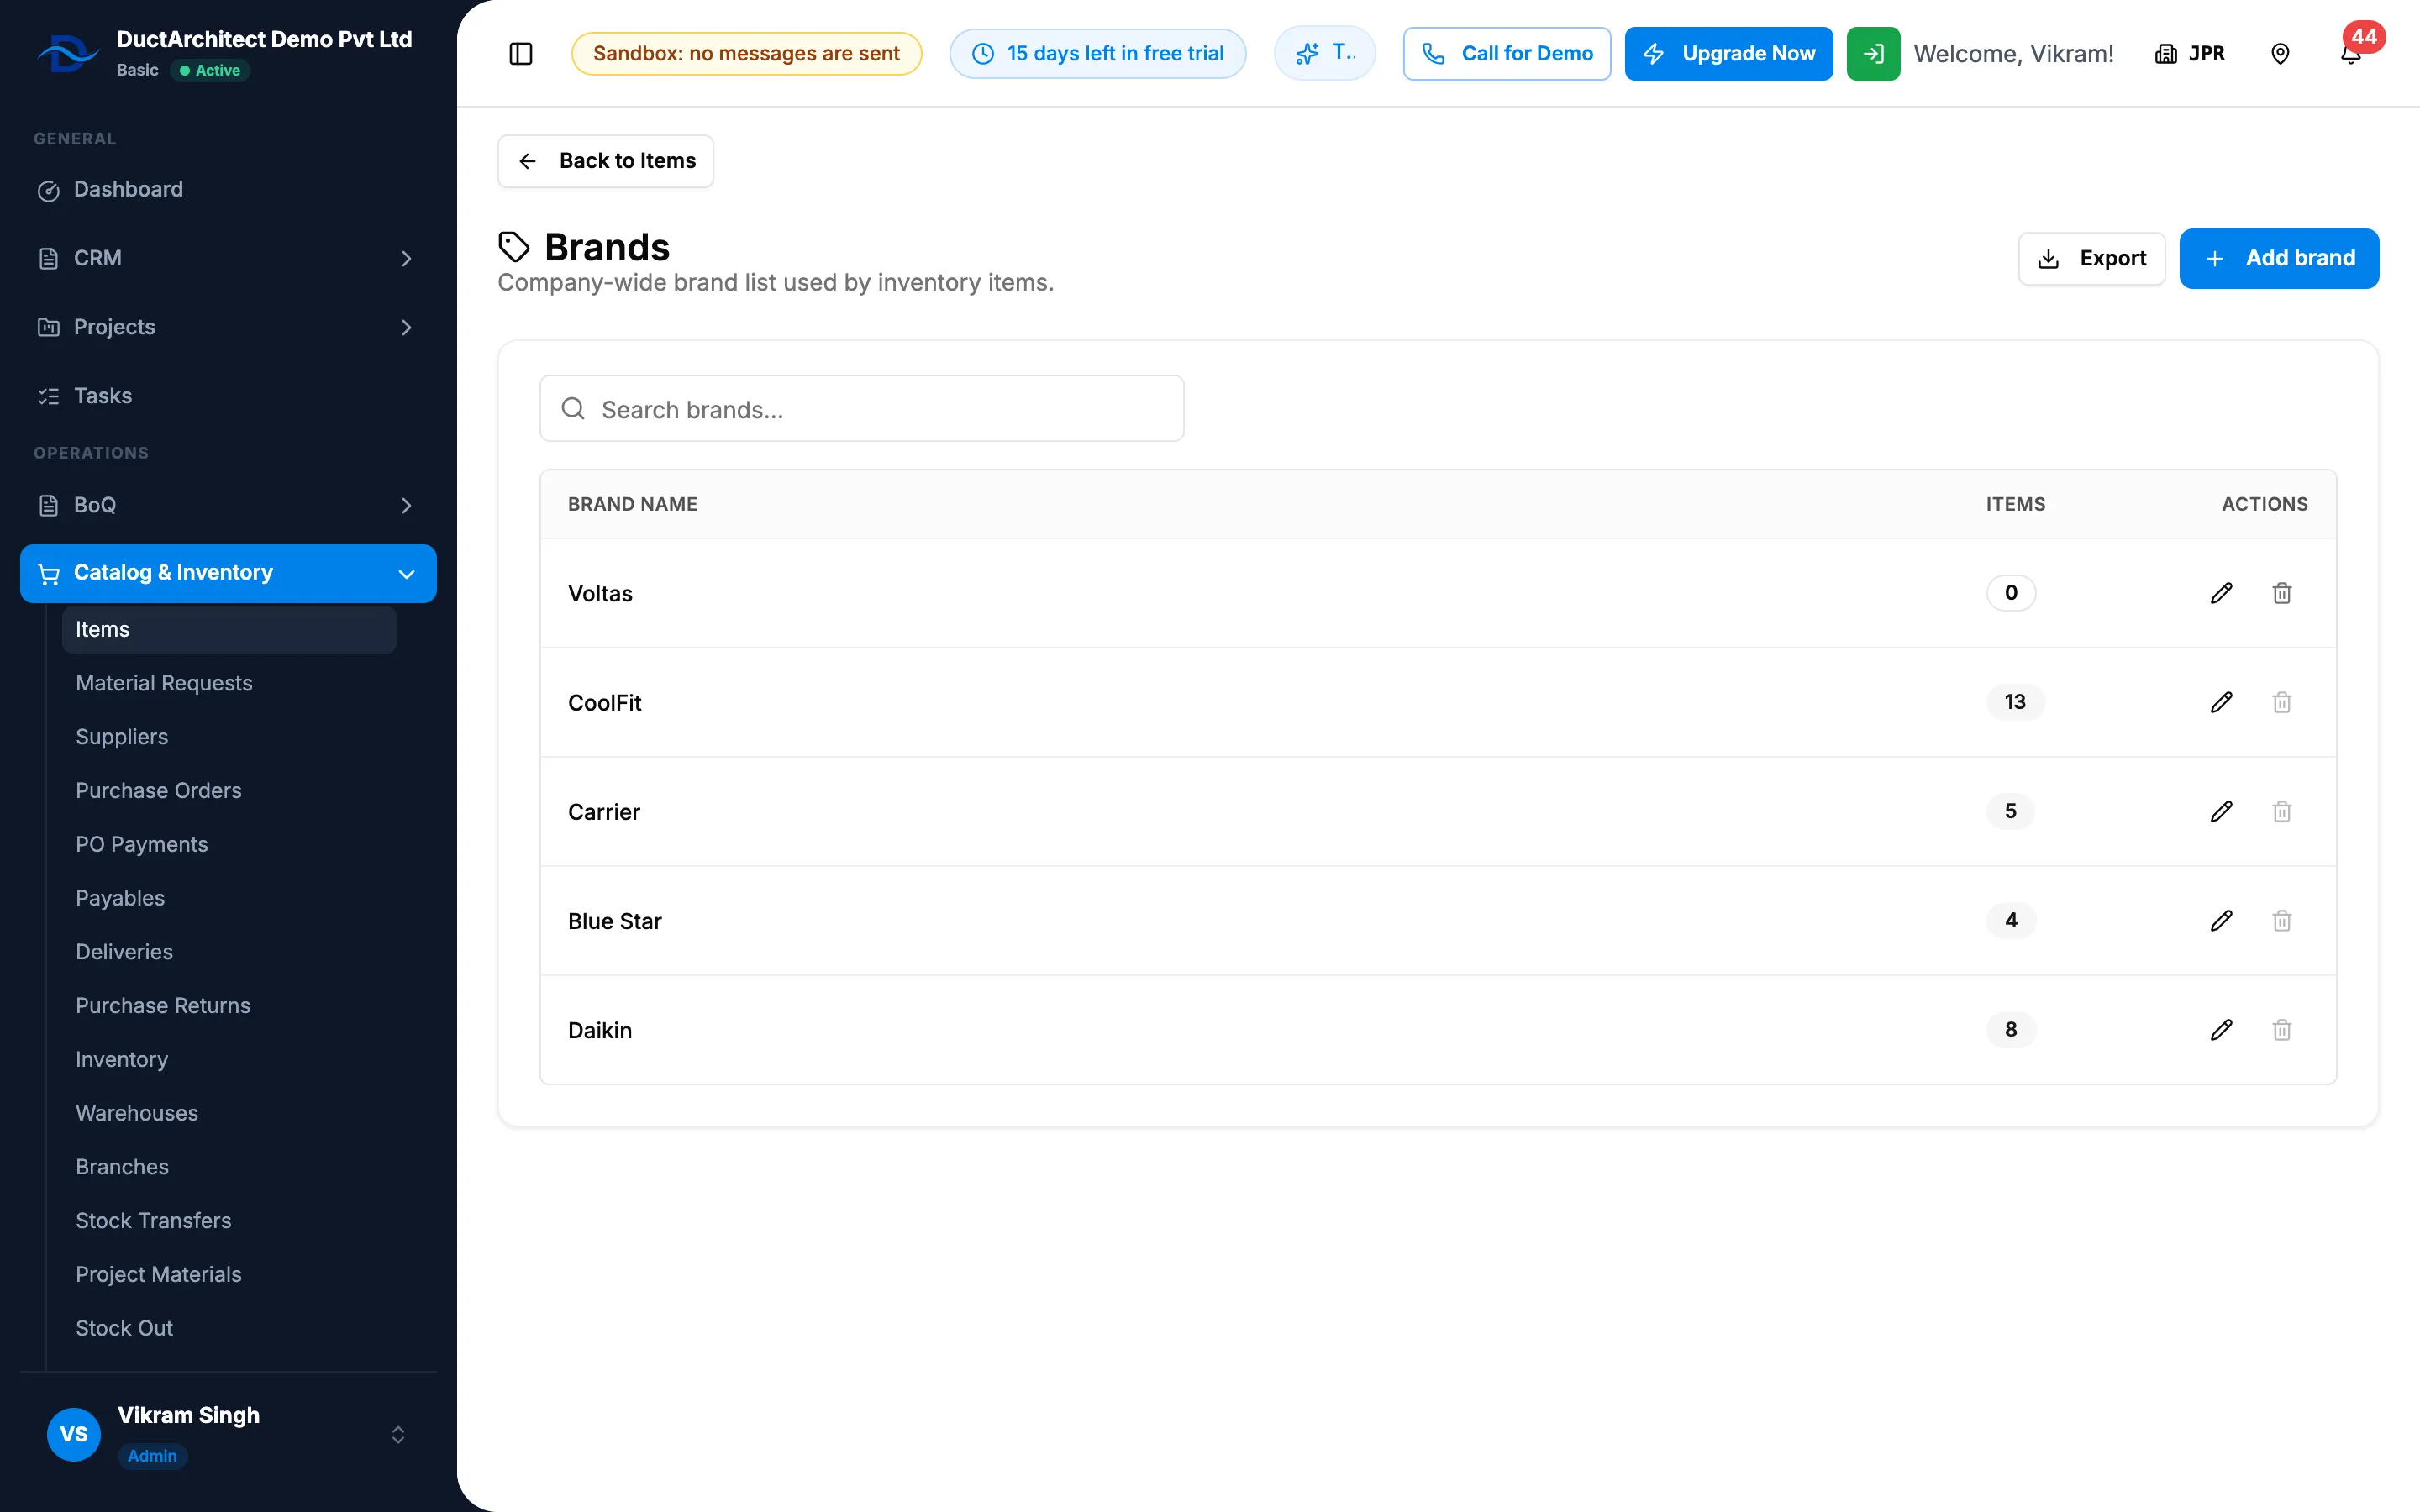
Step 2. The Brands page with Brand name, Items and the rename and delete icons. -
Select Add brand. The "Add brand" box opens: "Create a new brand for your inventory items."
-
Type the brand name.
-
Select Add.
Rename a brand
- On the Brands page, select the rename icon on the brand's row. The "Rename brand" box opens: "Renaming updates it everywhere it's used."
- Change the name.
- Select Save.
Delete a brand
- On the Brands page, select the delete icon on the brand's row. The box asks "Delete brand?" and "Delete "[name]"? It will be removed from the brand list; the record is kept."
- Confirm.
Result
Add a brand: "Brand added" shows, and the brand is offered in Brand on the item form.
Rename a brand: "Brand renamed" shows. Every item with the brand shows the new name.
Delete a brand: "Brand deleted" shows. The brand leaves the list and the item form.
The Items column counts the items that use each brand. To find a brand, type in "Search brands…". To export the list, select Export: the file is named after "Brands".
If something is different
- The delete icon is greyed out with "In use by [number] item(s)": change those items to another brand first. See A brand cannot be added, renamed or deleted.
- "Brand name is required": type a name.
- A message about a brand that already exists: use another name, or the brand already on the list.
- To go back, select Back to Items. The Brands page has no sidebar entry.