
Before you start
- You need Operation Management, and Edit on Duct and load calculations.
- The duct has its air quantity and its friction loss or target velocity. See Size a duct by friction loss or by velocity.
Steps
Pick a listed size
-
In Results, find "Rectangular equivalents pick one". The heights are 12, 14, 16, 18, 20 and 22 in on Imperial, or 250, 300, 350, 400, 500 and 600 mm on SI. Tags mark the Best fit size and any High ratio size. Two sizes can carry the Best fit tag at once. On a duct whose size is not yet applied, a Best fit size is already selected and drawn as the preview.
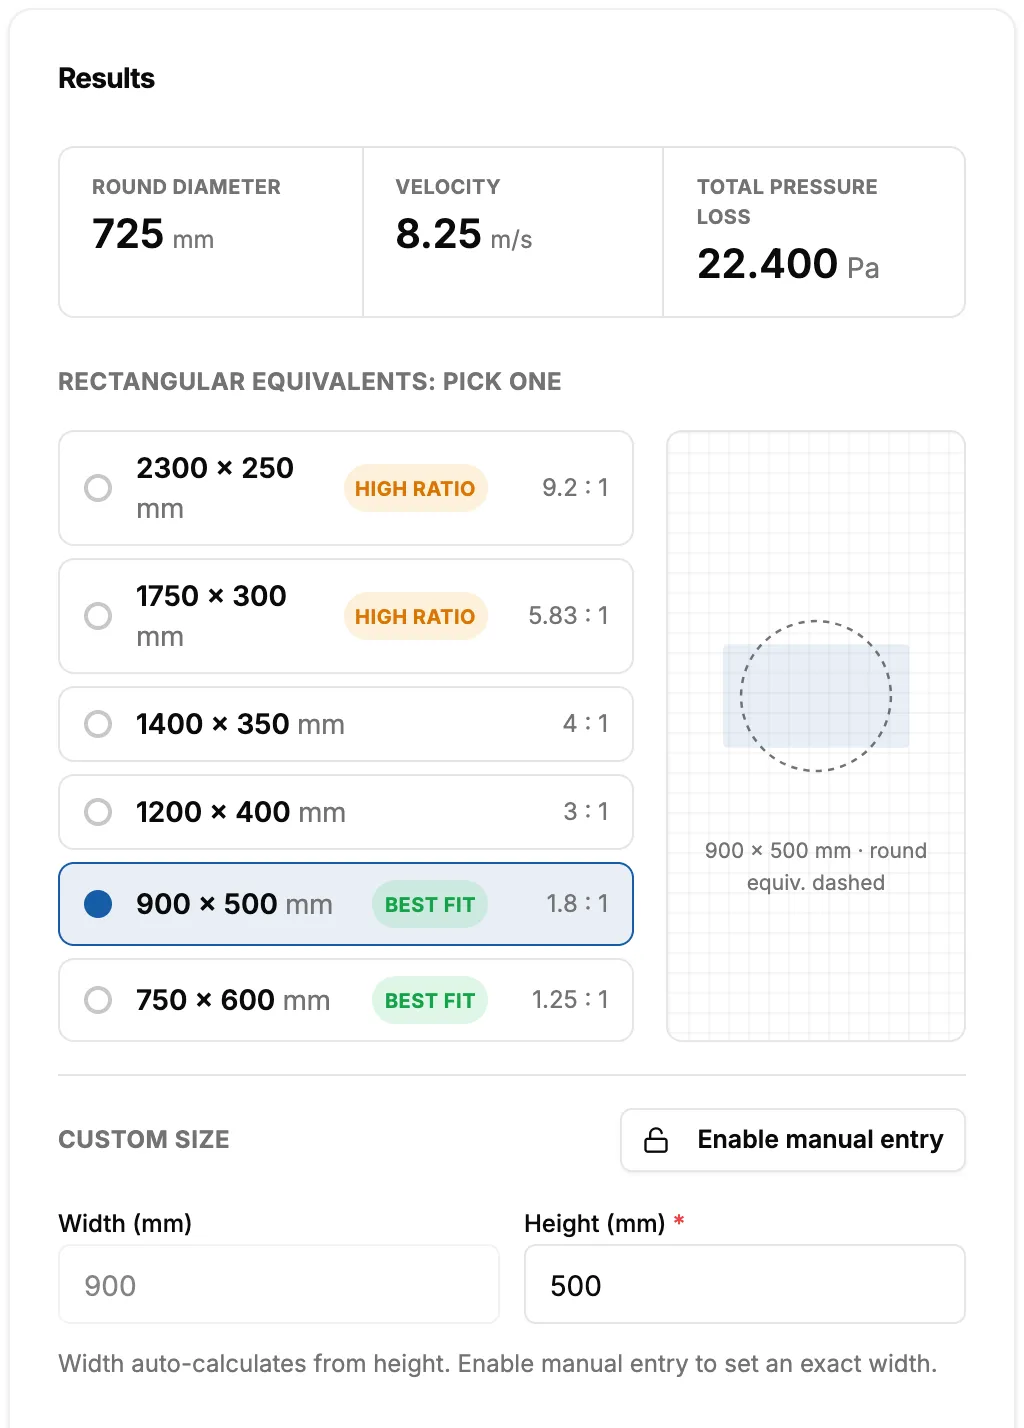
Step 1. The rectangular equivalents with the Best fit tag. -
To use another size, select it. It shows as a preview until you apply it.
-
Select Apply size to duct.
Enter your own size
- Under Custom size, select Enable manual entry. On a duct whose size is locked, it reads Unlock.
- Type the Width and the Height.
- Select Apply size to duct.
Unlock a size
- Select the duct, then select Unlock size at the bottom of the screen.
Result
Pick a listed size and Enter your own size: the size is applied and locked. Air data shows Locked and Results shows Size Locked.
Unlock a size: the badges go and the duct can be sized again.
If something is different
- "Flow is below the minimum rectangular duct size, consider round duct.": the air quantity is too small for the listed rectangular sizes.
- "Width cannot be zero." or "Height cannot be zero.": type both values.
- The width fills in by itself: with manual entry off, the width is worked out from the height ("Auto from height").
- A heat load change on a locked duct: see A duct shows the "Heat load updated" banner.